The one page the FSM gives for reassembling the intermediate shaft is okay but here is this thread anyway.
You should buy both seals, a new bearing, and a new axle snap ring.
3/4 Parts listed for google hax and convenience.

FOO2-25-744 ~$10

F002-25-742 ~$10

9960-68-2064 ~$40
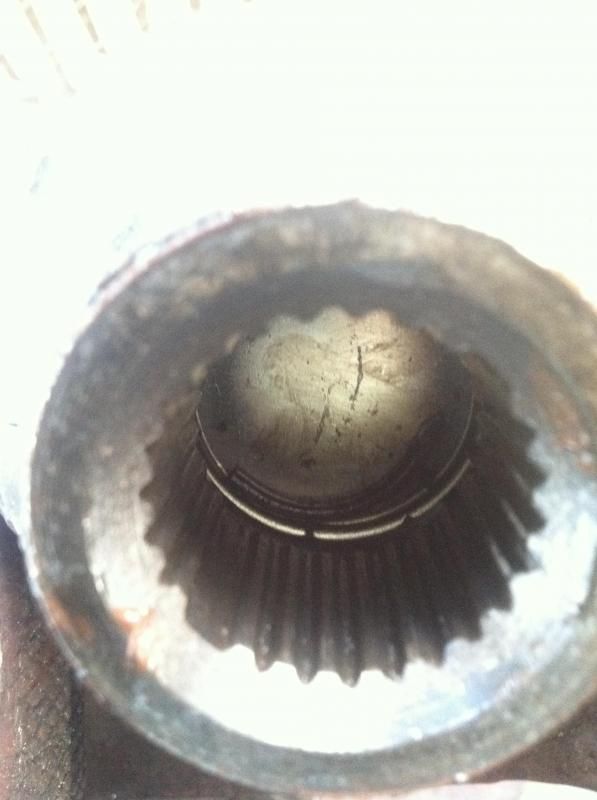
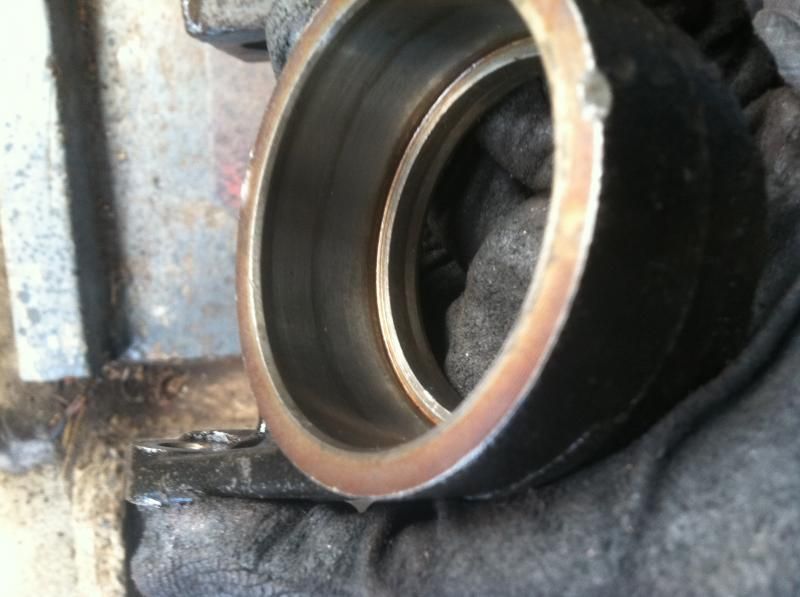
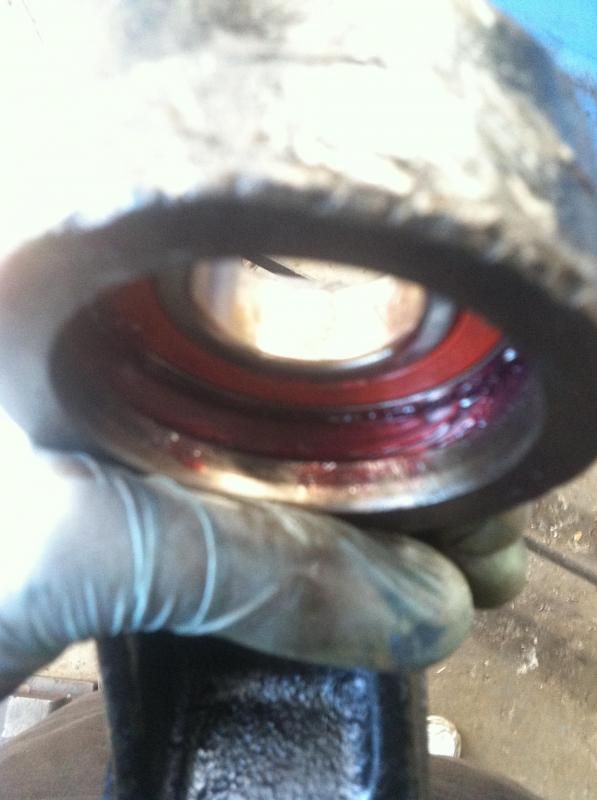
You should get a new snap ring because you have to remove it anyway and it's likely that's the one it came with from the factory so it's 20 years old. Mine helped contribute to my sized assembly and snapped on separation, here's half of it still in the CV
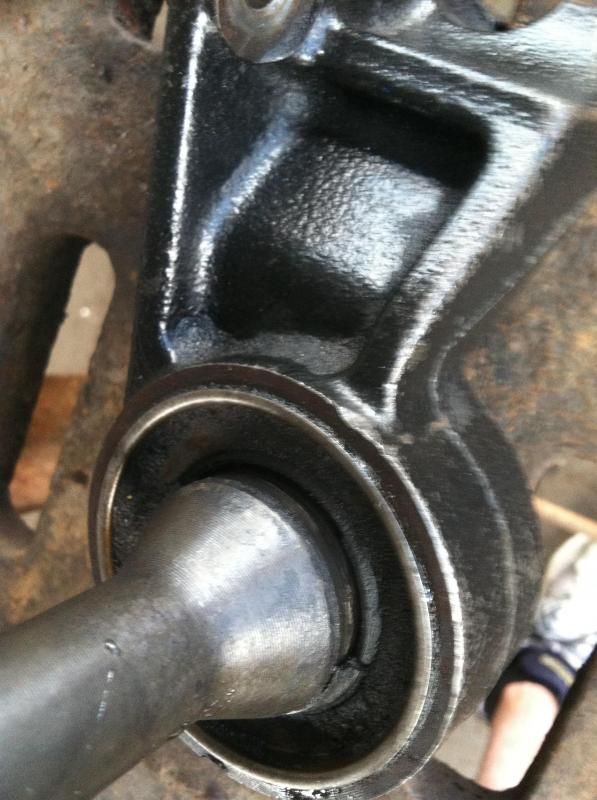
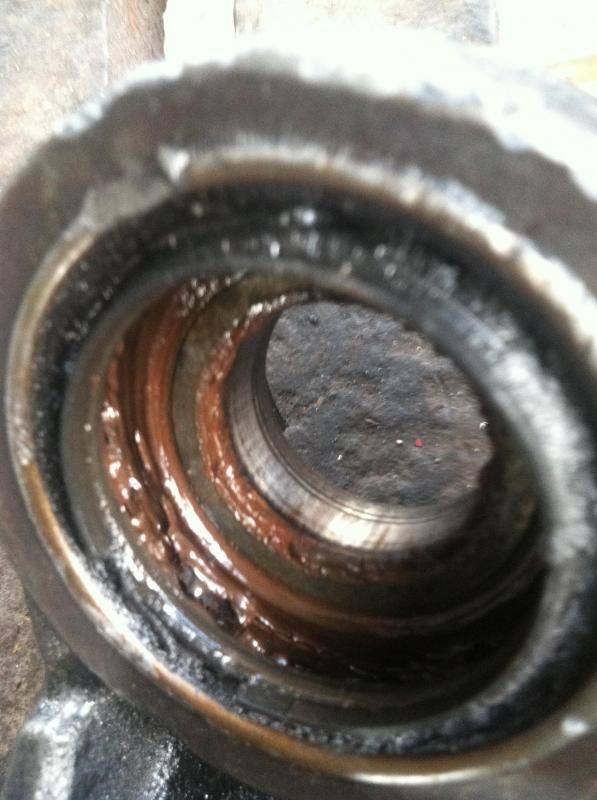
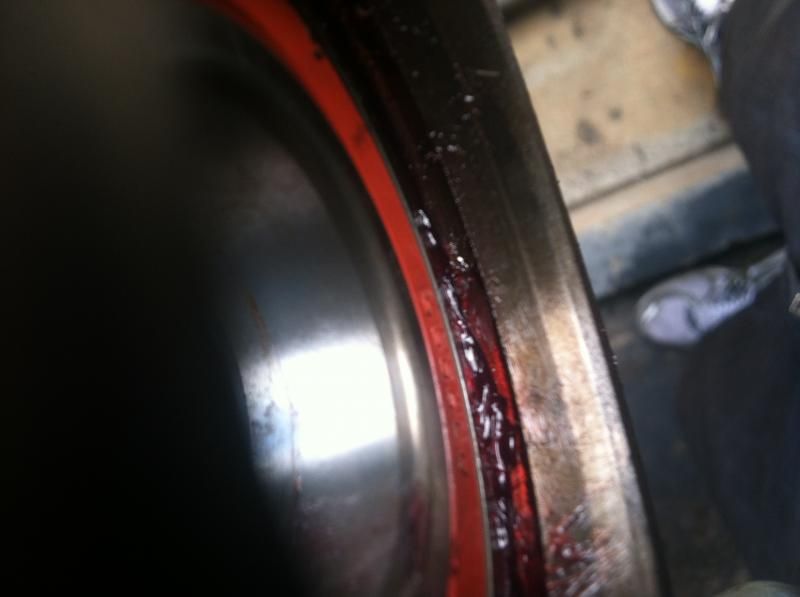
With the axle separate from the shaft take a look at your seals, mine were trashed.
Actual Disassembly
Remove the snap ring from the shaft, a pair of needle nose pliers or a flat head will work fine. Try not to damage shaft splines.
Set your assembly shaft side down in your press. You should have arbor plates that are designed almost perfectly for this.

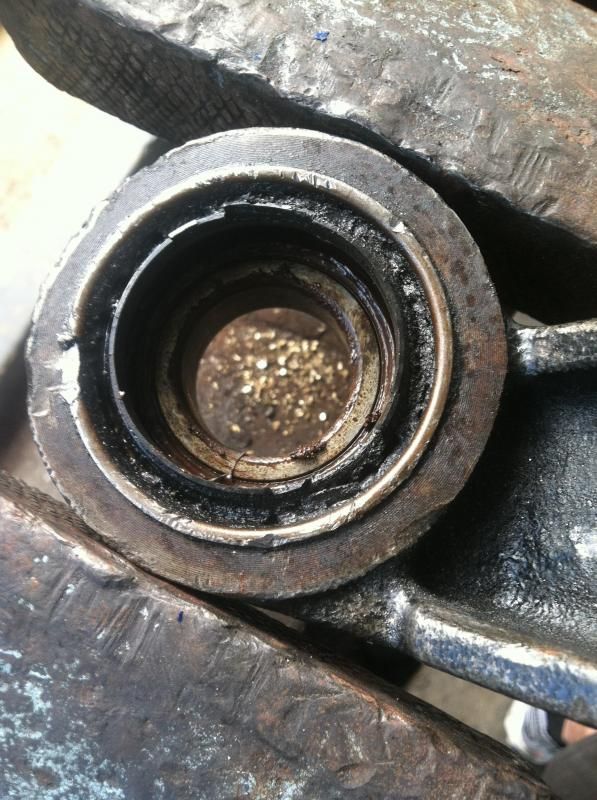
The bearing might come out with the shaft, move a little, or not move at all.
Mine moved a bit, rust grease is best grease.
I needed to remove the smaller(CV side) seal to get my 32mm socket to fit in the bearing to press.

I just used a flat head and popped it out, this bent it and made it unusable. If you're planning on reusing your seals I would try and remove the seal after you get the bearing out.
Don't worry about the seal on the transmission side, it will come out when you press the bearing out.

I used the socket side of my 32mm axle nut socket to remove the old bearing. Yours may not tapper the same way as mine so use whatever works. If your haven't remove the the CV side seal the largest socket you could use would be about 22mm.
Setting up the plates for this is kinda hard. I used the same ones from the last press. You can hammer it out while in a vice if you can't get a good setup.
You now have everything disassembled, compare your new **** with your old ****.
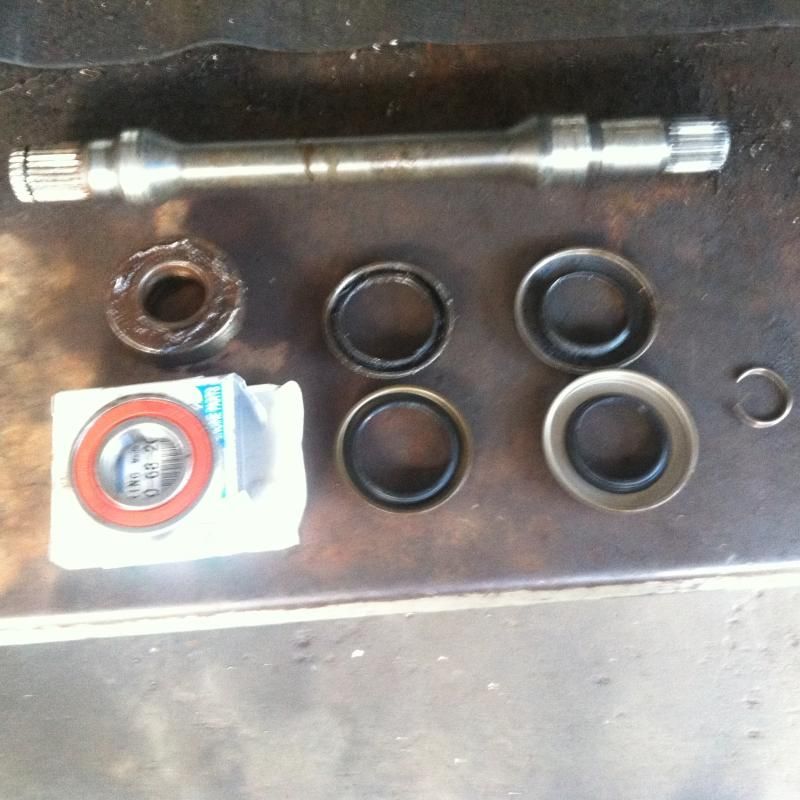
Clean up all the old components you'll be reusing as well as your old bearing.
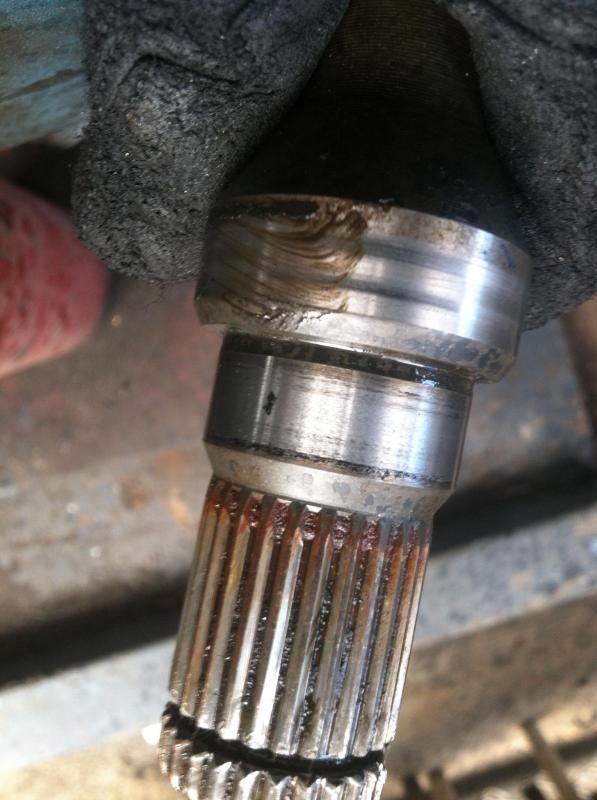
Get all the crud out of the splines.
Also clean up any raised metal edges you may have on the CV side of the shaft. I had about 10 splines that were marred fairly badly and made lining up and sliding the CV on a pain. A cold chisel and a hammer work fine for this.
Test fit your axle to make sure it goes on the shaft smoothly. With no snap ring it should slide on with minimal effort and come off with slightly more. Once you're satisfied with assembly ease clean the splines again and the inside of the CV housing.
REASSEMBLY
You can skip this step if you prefer as it's not technically proper
LIGHTLY grease the outside of the bearing, it's a very tight press and excessive grease on the initial will just make it more difficult.
Because no one is going to have magic special service tools I use a three tier method to press the bearing in.
For the initial alignment press I use a flat peice of steel directly on the new bearing.
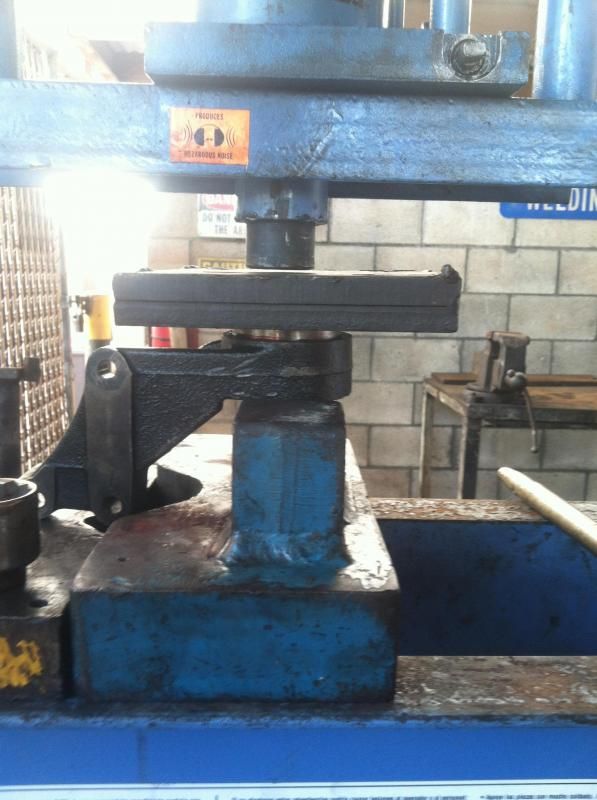
The initial pop in is the hardest part of this press and this makes it easier than using the old bearing as the press in. Press this down until the metal plate is flush against the housing.
This is about the amount of space you'll have after the first press. Put some grease in there.
Next take your old bearing and sandwich it between your metal plate and your new bearing. I didn't take a photo of this apparently. You should know what a sandwich look like.
Press this until about 1/2 the old bearing is in the housing. You CAN chance it and press it until it bottoms the new bearing out but I wouldn't trust getting the old bearing out.
This is the amount of space left to press after using the old bearing to about 1/2 it's height.
Drive the last bit with whatever you used to remove the original bearing or a socket that fits on the outside diameter of the bearing. While pressing a bearing from the center isn't optimal it should be low force at this point and it's infinitely better than pressing it from the bearing shield. The likely-hood you have a ~45mmsocket is also minimal.
Bearing fully seated.

Make sure it has the same amount of play as it did before you pressed it.
ALTERNATIVLY USE RYAN'S METHOD
When pushing the bearing back in, you must ALWAYS use its outer race & never reinstall it flat as you did. If you do not have a proper tool to do so. cut the outer race of the original bearing in a slit & knock out the internals. this method will allow you to press the new bearing in to a fully seated position & still remove the original bearing race with ease.
when you are pressing the halfshaft back in. again you must use the center shaft relief & support the Inner bearing race from underneath until the shaft is fully seated.
SEALS WHEN?
Now to discuss the seals. the Transmission side seal needs to go around the shaft before you press it in the bearing if you still have the input shaft dust shield attached to the shaft(mine fell off at some point during the day I eventually found it.) If you've removed that it can go on after.
I'd recommend just having the seal loose on the shaft and not in it's place as it can be damaged while pressing the shaft in.
The CV side seal should be put on after the shaft is pressed in as it can be damaged during the last press. It needs to be put on before the axle snap ring is put on.
I had to cheat a bit and start the shaft in a vice with a rubber mallet.
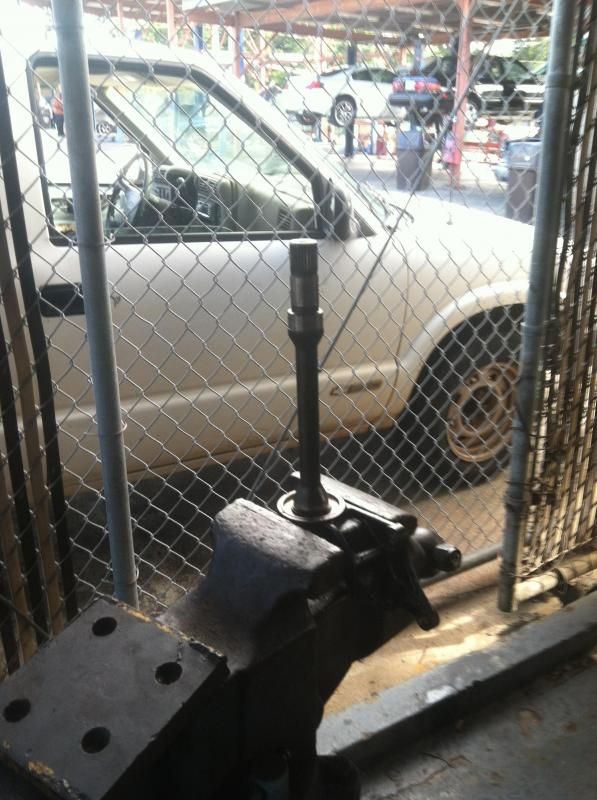
I'd honestly recommend this for most people as setting the arbor plates so the half shaft mounting bracket is flat and the shaft presses straight is hard. You should just start with the vice/mallet and finish it off in the press.

Test fit your CV before you install the snap ring. make sure it looks and fits normally. You should be able to see any misalignment that would cause issue. Install the dust seals with lite hammer taps and a flat media to adsorb some of the impact. I also hit a few areas with a chisel to make sure it stays in place.

I install snap rings by pressing them open end towards the shaft with my left thumb and slightly prying one of the ends with a tiny flat head. If you use a tool to hold the ring be careful not to damage it or have it shoot out to god knows where. And once again mind the splines.
The new assembly will probably not spin as easily as the old bearing( unless your old one was really gone) but this is normal and will loosen up after some driving. As long as it spins uniformly it should be fine.
This is about a 3-5 hour job start to finish(From wheels on ground to wheels on ground). Depending on how you value your time it might be cheaper to have a shop replace the bearing and seal for you. If minimizing downtime is important a spare intermediate shaft could be sourced and refreshed and it would be a simple remove and replace.
You should buy both seals, a new bearing, and a new axle snap ring.
3/4 Parts listed for google hax and convenience.

FOO2-25-744 ~$10

F002-25-742 ~$10

9960-68-2064 ~$40
You should get a new snap ring because you have to remove it anyway and it's likely that's the one it came with from the factory so it's 20 years old. Mine helped contribute to my sized assembly and snapped on separation, here's half of it still in the CV

With the axle separate from the shaft take a look at your seals, mine were trashed.

Actual Disassembly
Remove the snap ring from the shaft, a pair of needle nose pliers or a flat head will work fine. Try not to damage shaft splines.
Set your assembly shaft side down in your press. You should have arbor plates that are designed almost perfectly for this.

The bearing might come out with the shaft, move a little, or not move at all.

Mine moved a bit, rust grease is best grease.

I needed to remove the smaller(CV side) seal to get my 32mm socket to fit in the bearing to press.

I just used a flat head and popped it out, this bent it and made it unusable. If you're planning on reusing your seals I would try and remove the seal after you get the bearing out.
Don't worry about the seal on the transmission side, it will come out when you press the bearing out.

I used the socket side of my 32mm axle nut socket to remove the old bearing. Yours may not tapper the same way as mine so use whatever works. If your haven't remove the the CV side seal the largest socket you could use would be about 22mm.
Setting up the plates for this is kinda hard. I used the same ones from the last press. You can hammer it out while in a vice if you can't get a good setup.
You now have everything disassembled, compare your new **** with your old ****.

Clean up all the old components you'll be reusing as well as your old bearing.


Get all the crud out of the splines.
Also clean up any raised metal edges you may have on the CV side of the shaft. I had about 10 splines that were marred fairly badly and made lining up and sliding the CV on a pain. A cold chisel and a hammer work fine for this.
Test fit your axle to make sure it goes on the shaft smoothly. With no snap ring it should slide on with minimal effort and come off with slightly more. Once you're satisfied with assembly ease clean the splines again and the inside of the CV housing.
REASSEMBLY
You can skip this step if you prefer as it's not technically proper
LIGHTLY grease the outside of the bearing, it's a very tight press and excessive grease on the initial will just make it more difficult.
Because no one is going to have magic special service tools I use a three tier method to press the bearing in.
For the initial alignment press I use a flat peice of steel directly on the new bearing.

The initial pop in is the hardest part of this press and this makes it easier than using the old bearing as the press in. Press this down until the metal plate is flush against the housing.
This is about the amount of space you'll have after the first press. Put some grease in there.

Next take your old bearing and sandwich it between your metal plate and your new bearing. I didn't take a photo of this apparently. You should know what a sandwich look like.
Press this until about 1/2 the old bearing is in the housing. You CAN chance it and press it until it bottoms the new bearing out but I wouldn't trust getting the old bearing out.
This is the amount of space left to press after using the old bearing to about 1/2 it's height.

Drive the last bit with whatever you used to remove the original bearing or a socket that fits on the outside diameter of the bearing. While pressing a bearing from the center isn't optimal it should be low force at this point and it's infinitely better than pressing it from the bearing shield. The likely-hood you have a ~45mmsocket is also minimal.
Bearing fully seated.

Make sure it has the same amount of play as it did before you pressed it.
ALTERNATIVLY USE RYAN'S METHOD
When pushing the bearing back in, you must ALWAYS use its outer race & never reinstall it flat as you did. If you do not have a proper tool to do so. cut the outer race of the original bearing in a slit & knock out the internals. this method will allow you to press the new bearing in to a fully seated position & still remove the original bearing race with ease.
when you are pressing the halfshaft back in. again you must use the center shaft relief & support the Inner bearing race from underneath until the shaft is fully seated.
SEALS WHEN?
Now to discuss the seals. the Transmission side seal needs to go around the shaft before you press it in the bearing if you still have the input shaft dust shield attached to the shaft(mine fell off at some point during the day I eventually found it.) If you've removed that it can go on after.
I'd recommend just having the seal loose on the shaft and not in it's place as it can be damaged while pressing the shaft in.
The CV side seal should be put on after the shaft is pressed in as it can be damaged during the last press. It needs to be put on before the axle snap ring is put on.
I had to cheat a bit and start the shaft in a vice with a rubber mallet.

I'd honestly recommend this for most people as setting the arbor plates so the half shaft mounting bracket is flat and the shaft presses straight is hard. You should just start with the vice/mallet and finish it off in the press.

Test fit your CV before you install the snap ring. make sure it looks and fits normally. You should be able to see any misalignment that would cause issue. Install the dust seals with lite hammer taps and a flat media to adsorb some of the impact. I also hit a few areas with a chisel to make sure it stays in place.

I install snap rings by pressing them open end towards the shaft with my left thumb and slightly prying one of the ends with a tiny flat head. If you use a tool to hold the ring be careful not to damage it or have it shoot out to god knows where. And once again mind the splines.
The new assembly will probably not spin as easily as the old bearing( unless your old one was really gone) but this is normal and will loosen up after some driving. As long as it spins uniformly it should be fine.
This is about a 3-5 hour job start to finish(From wheels on ground to wheels on ground). Depending on how you value your time it might be cheaper to have a shop replace the bearing and seal for you. If minimizing downtime is important a spare intermediate shaft could be sourced and refreshed and it would be a simple remove and replace.


Comment