Originally posted by g3mccotter
View Post
-
Not without modification the evo flange does not bolt up directly. You have to change the evo flange to the bp flange for it to bolt up. -
Got these in the mail the other day

Gas tank O ring no more worry about fulling the gas tank @ the pump [laugh]

Lateral links no more back end wondering like a drunk on the straights *[2thumbsup]

80A liquid urethane kit for solid engine mounts mod. This kit is also available in other hardness (Durometer) level: 60A Daily Drive & 94A Race Quality
 Last edited by mazkam; 08-07-2010, 09:02 PM.
Comment
-
Replace the worn out & busted lateral links the other day & I was very pleased with the immense difference in ride quality. The car was very stable @ highway speed which was always my biggest problem with the car handling good. No more back end wondering like a drunk on the straights.
Things done this week
Install front brake pads
Install the gas tank O ring
Do the urethane kit for solid engine mounts mod
I put these up for sale

Replaced by these


Comment
-
Turbo upgrade underway
Removal of bpt exhaust manifold with Garrett t25/t28

Side by side comparison Garrett t25/t28 & t3/t4


M12 - 1.25 bolt for water block off


Tuned length manifold with external wastegate & Garrett t3/t4 turbocharger


Here you will see how close the space is between the a/c condenser & the compressor housing [thumbsdown] & the radiator nuh gone in yet.

Will have to get this @ a later date due to space constraints
 Last edited by mazkam; 08-08-2010, 10:08 AM.
Comment
-
Over the weekend I had done the liquid urethane solid engine mounts mod.
Items required
Liquid Urethane - 80A
Contact Cement - Helps the duct tape seal against greasy surfaces
Duct Tape - Seals one side of the mount
Degreaser - Cleans the mount of grease and oil to ensure an easy project
Sand - in a container - vital to the project - don't skip this one.
Items required to do the mod

Step One - Preparing the Motor Mounts
Make sure the mounts have voids for urethane to pour though

Cleared out

For the Urethane to bond correctly and to ease the overall process, the mounts must be thoroughly cleaned of grease and dirt.

Step Two - Seal One Side
The best way to do this is with some contact cement and duct tape. While duct tape alone will usually work - the contact cement will ensure a good seal - especially if there's any greasy residue on the mounts (the tape will not adhere properly).
Once you've set a good layer of contact cement seal off the mount with the duct tape.
Setting Up The Mounts
It's important that the mounts are completely level before you pour the urethane into them. If they're laying at an angle the mount will not turn out right.
Place mounts in container with sand. This will allow a perfectly level placement - even if there are protrusions from the mounts that would other wise make it sit screwy & help seal off any small holes that will allow the urethane to leak out
DO NOT attempt to do this without the sand box.
Mixing the Urethane
Activator and Urethane

Mixed the urethane and activator throughly before pouring it into the mount.

Pouring the Urethane

They were installed the following day.Last edited by mazkam; 08-18-2010, 11:44 AM.Comment
-
Nice writup. You should copy it and put it into the how to section.
What's the dry time suppose to be?1993 Protege LX-Midnight's shadow SOLD
1996 Honda CBR600-Wrecked. Damn Honda crippled me
2002 mazda MPV-family truckster SOLD
2010 VW routon

Originally posted by jayComment
-
Thanks for the comment Turpro. The instruction states mounts should be completely dried out and fully usable within 2 days. However most users report that by the next morning after mixing, the mounts are ready to go and at least be mounted in the vehicle.
I had done mine around 7 am in the morning & when night came i just place them behind my fridge until the following morning .
.
I will have to do some editing & add a few more pix before I copy it and put it into the how to section.Last edited by mazkam; 08-18-2010, 01:15 PM.Comment
-
Had a little run in with a drainage cover the other day. Here are some pix of the outcome.

Taken off the car
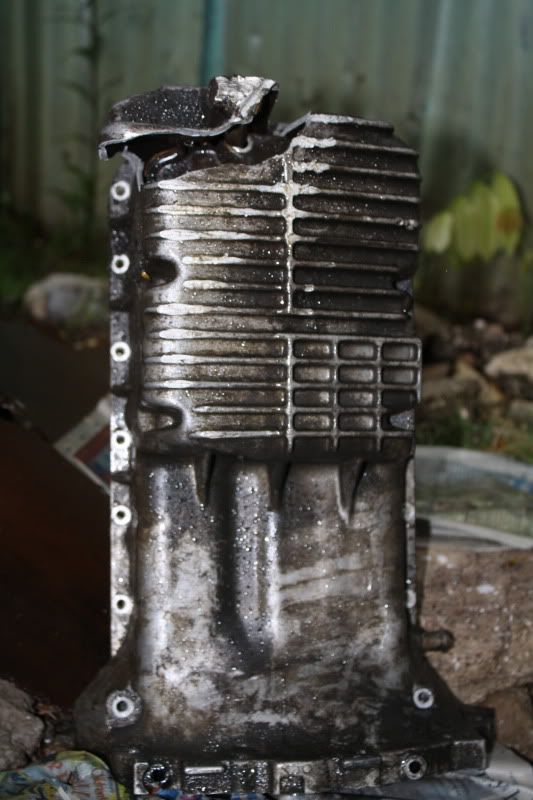
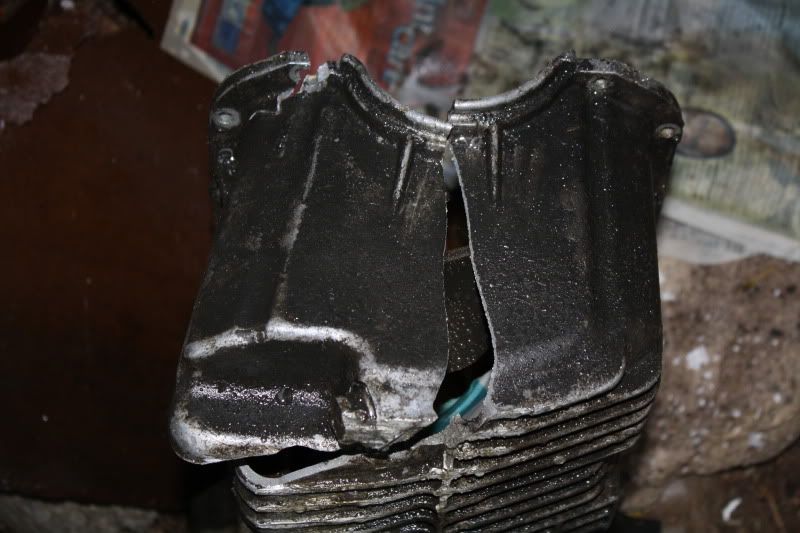
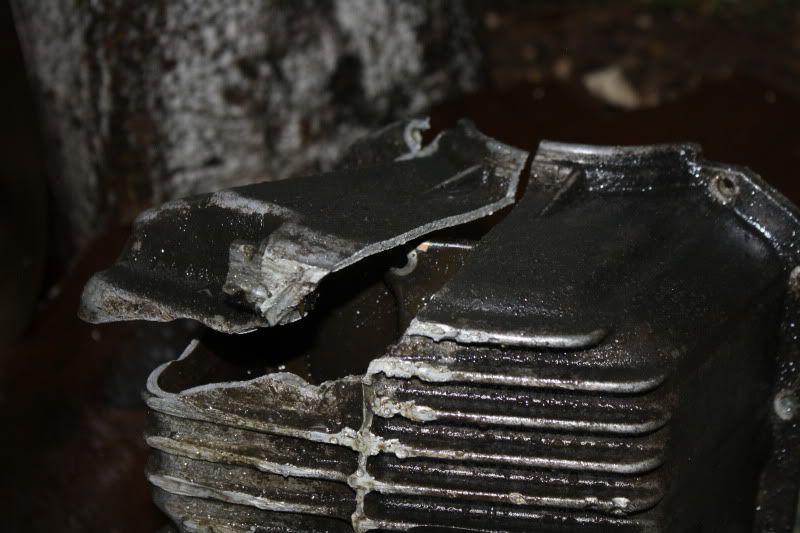
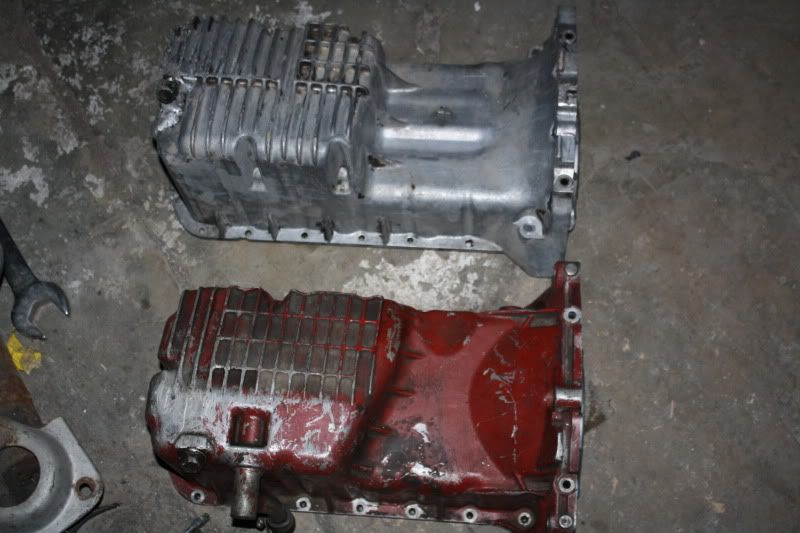
I was unable to source another bpt crankcase, so I got a bp crankcase as the replacement.
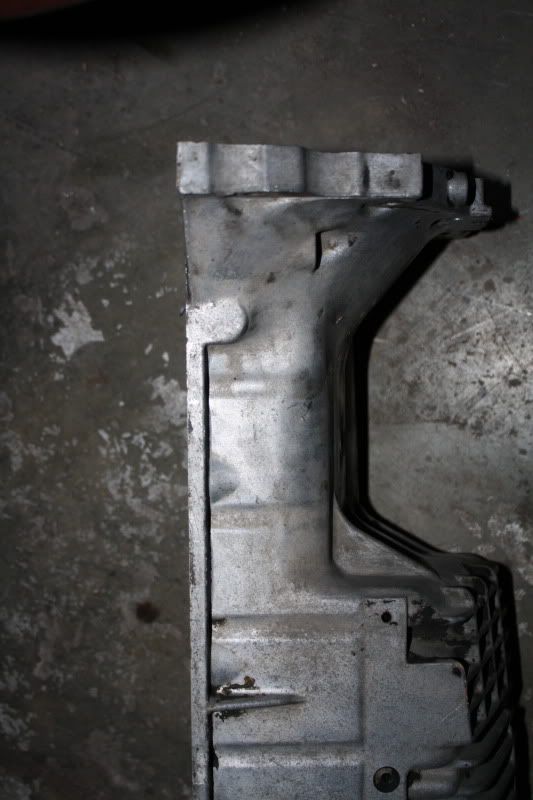
Side by side comparison between the bp (silver) & b6t (red) crankcase
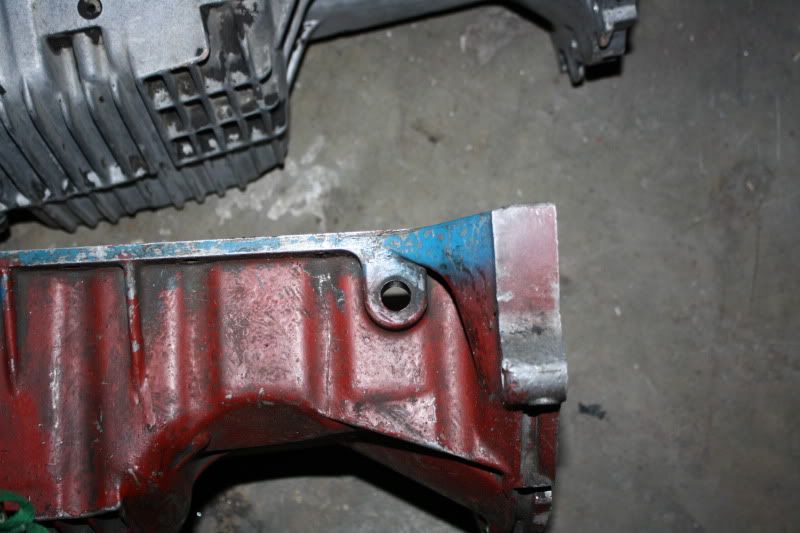
I took the turbo oil drain pipe from the b6t crankcase to fit into the bp crank case
 *
*
Comment
-
Got the bp crank case from the machine shop with oil return welded on. The mod was done @ Campbell E&E Engineering Works Ltd.
B4

After


Comment
-
These 8.5mm Magnecor racing plug wires will be replaced
By these Toyota Coil Over Plug a.k.a COP

I have purchase the following accessories for my MegaSquirt & awaiting delivery.
IAT sensor
CLT sensor
12' MegaSquirt Wiring Harness
Next are the
Crank sensor
36-1 Trigger WheelLast edited by mazkam; 10-20-2010, 06:26 AM.Comment
-
Got mail.


Megasquirt Accessories
12' wiring harness with external wiring diagram
Closed element CLT sensor with uncrimped connector & pins
GM onpen element IAT sensor with uncrimped connector & pin
USB-serial adapter
External Wastegate spring 0.5 barComment
-
Here is a small update as what been going on with my project. Since the last post i have acquire the following items for my car to complete my brake upgrade & install Megasquirt ems.
Brake items recently acquired.
Mitsubishi Galant 266mm Brembo front disc rotors & back disc rotors
MX6 front lug studs
KVR performance brake pads
Brake Parts installed.
BG 323 22V stamp front brake calipers
Corksport steel braided brake line
Parts remaining to make items required for the Galant brake upgrade complete.
95 323/Protege brake booster
929 1" bore master cylinder.
Item recently acquired for Megasquirt.
Motorcraft crankshaft sensor
Already acquired.
12' wiring harness with external wiring diagram
Closed element CLT sensor with uncrimped connector & pins
GM onpen element IAT sensor with uncrimped connector & pin
USB-serial adapter
Toyota coil over plug COP & connectors
Item remaining to complete items required to install Megasquirt.
36 - 1 144mm crank trigger wheel currently in transit to Ja
Sort out the Megasquirt to run COP as it is currently configured to run Ford EDIS 4 ignition system. I was going to work with the EDIS 4 ignition system, but then i found out that i won't be able to use the launch control & spark cut features on the Megasquirt. So i am staying with the Toyota cop.Last edited by mazkam; 12-07-2010, 05:34 AM.Comment
-
i like this build. that exhaust mani is pretty interesting looking. when i did my mounts i poured them the night before around 6:30 pm and they were ready to go by 8 am the next morning. nice build so far again.Comment
-
Thanks for the comment bighead323.Comment
-
holy crap lots has changed since i last posted lol, looking amazing man! keep it up!-Jack
ONTARIO MAZDA CLUB! Join! https://www.facebook.com/groups/500055016671733/
91 626 LX - basically stock and pretty slow still
http://www.clubprotege.com/forum/sho...my-GD-626-LX-)
01 E53 3.0i - FOR SALE! pm if interested
91 USDM Protege LX - SOLD! turbo/manifold up for sale!
http://www.clubprotege.com/forum/showthread.php?t=46606Comment


Comment