This is a rebuild of the window motor from a 1988 GTX.
You will need the following tools:
#2 phillips head screwdriver
8mm socket, either deep or with an extension
flat head screw driver
pliers
snap ring pliers (maybe)
1000 grit sandpaper

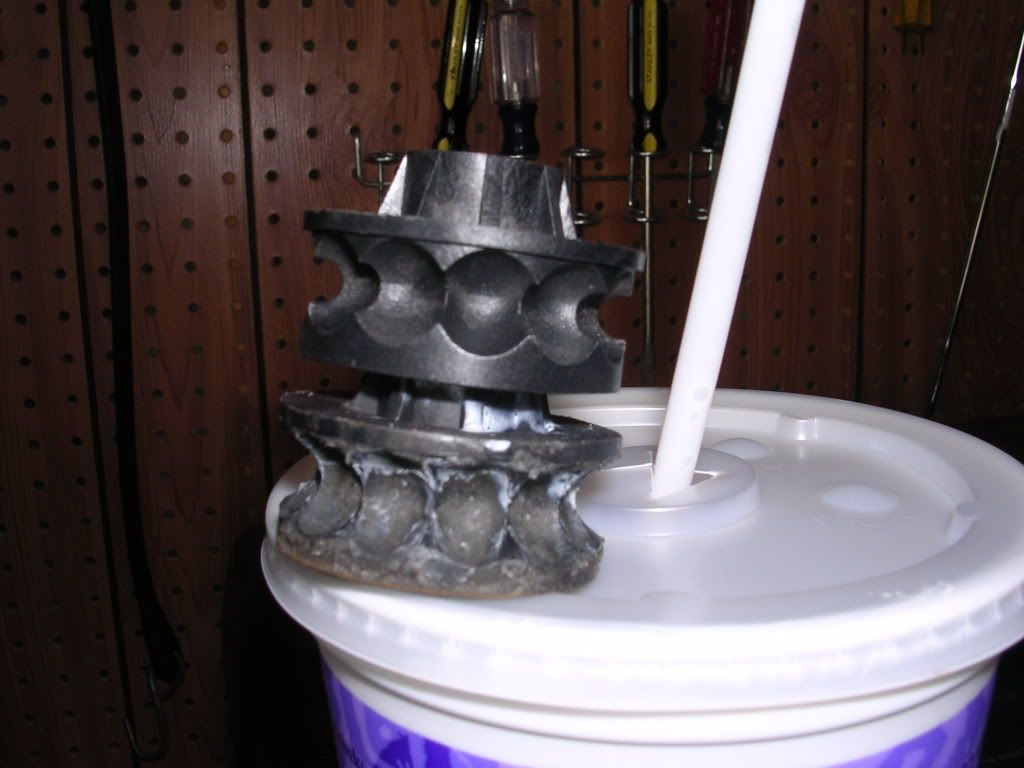
Here is a picture of the front side of a window motor assembly:

Here is a picture of the back side of the same assembly:

If you have not already done so, remove the clamp holding the plastic tube in place and remove the tube. There are a bunch of metal tabs accessible from the back side of the assembly. Straighten out all the tabs. Remove the small metal plate from the base near where the tube was. There are three screws holding the motor onto the plastic base. Remove these three screws. You can now remove the motor from the base.

Examine the drive gear. A good gear will look like this one from a passenger side:

A bad drive gear will look like this one:

here is another picture of a bad gear:

This will give you the click, click click sound. Unfortunetly, this part cannot be purchased seperately so if it looks like this, you either buy a new assembly or find a passenger to swap parts with.
Here is a picture of two plastic chains:

Note the one on top has a lot of black stuff on it. This is the residue from the drive gear going bad. Clean off the drive chain and look for brown spots like these:

They indicate a spot where the click, click, clicking has fried the chain. This chain cannot be reused and was discarded.
Now, let's take the motor apart. There are two phillips head screws at the base of the motor. Remove them then just pull the shell off the motor. You will see something like this:

Take a close look at the commutator end. In this picture you can see a black stripe arond the commutator:

using your 1000 grit sand paper, sand this black stuff off to get this:

Stuff the commutator back into the shell, then stuff the motor back into drive gear assembly and put your two screws back in.
Here is a picture of the plastic bases. Not that one has more black residue from the drive gear going bad. Clean up these pieces and spray them with lube.

After cleaning all parts and lubricating with your favorite soft grease, reassemble the parts. Make sure to stake the metal tabs down tightly!
Comments?
Bob
You will need the following tools:
#2 phillips head screwdriver
8mm socket, either deep or with an extension
flat head screw driver
pliers
snap ring pliers (maybe)
1000 grit sandpaper
Here is a picture of the front side of a window motor assembly:
Here is a picture of the back side of the same assembly:
If you have not already done so, remove the clamp holding the plastic tube in place and remove the tube. There are a bunch of metal tabs accessible from the back side of the assembly. Straighten out all the tabs. Remove the small metal plate from the base near where the tube was. There are three screws holding the motor onto the plastic base. Remove these three screws. You can now remove the motor from the base.
Examine the drive gear. A good gear will look like this one from a passenger side:
A bad drive gear will look like this one:
here is another picture of a bad gear:
This will give you the click, click click sound. Unfortunetly, this part cannot be purchased seperately so if it looks like this, you either buy a new assembly or find a passenger to swap parts with.
Here is a picture of two plastic chains:
Note the one on top has a lot of black stuff on it. This is the residue from the drive gear going bad. Clean off the drive chain and look for brown spots like these:
They indicate a spot where the click, click, clicking has fried the chain. This chain cannot be reused and was discarded.
Now, let's take the motor apart. There are two phillips head screws at the base of the motor. Remove them then just pull the shell off the motor. You will see something like this:
Take a close look at the commutator end. In this picture you can see a black stripe arond the commutator:
using your 1000 grit sand paper, sand this black stuff off to get this:
Stuff the commutator back into the shell, then stuff the motor back into drive gear assembly and put your two screws back in.
Here is a picture of the plastic bases. Not that one has more black residue from the drive gear going bad. Clean up these pieces and spray them with lube.
After cleaning all parts and lubricating with your favorite soft grease, reassemble the parts. Make sure to stake the metal tabs down tightly!
Comments?
Bob
Comment